Follow Me on Pinterest

Friday, February 24, 2012

Stampin' Addicts 3rd Anniversary Party Blog Hop


Welcome to the Stampin' Addicts 3rd Anniversary Party Blog Hop. To celebrate this anniversary all of the Stamping Artists on this hop have created projects that center around party themes, for a total of 11 stops on this tour! The Blog List and order can be viewed at Stampin' Addicts.

If you've been following the hop you might have arrived from Lisa's blog Add Ink and Stamp, where she is planning a Bridal Shower, and if you are starting here, just keep following the links and you'll make it back there!

Around here we are in the beginning stages of planning a Bridal Shower too, and what kind of Bridal Shower would I be hosting if it wasn't a Wine Tasting Party? Today I am sharing three projects for this party with you. All parties start with an invitation:


For this invite I used the Ornate Blossom from the Friends Never Fade inked with Island Indigo and stamped onto a 5x7 piece of Very Vanilla Card Stock. My Stamp-A-Ma-Jig helped me to line those babies up perfectly! Then I layered the printed invitation (trimmed down to a 3x5 size) onto two strips of Island Indigo Card Stock that I cut using the Adorning Accents Edgelits and assembled the card. I finished the whole thing off with a bit of 5/8" Very Vanilla Satin Ribbon.


Next up is my bottle of wine. Of course our wines will need coordinating labels, and while I normally wrap my card stock all the way around a bottle of wine when I am embellishing, for this party it seems fitting that guests would want to be able to read the label at some point. I created my label with more Very Vanilla and Island Indigo Card Stock. I wanted to keep the front simple and elegant. I really love the ornate swirl that is found on the Tea for Two stamp in my Tea Shoppe set, but since this isn't a Tea Party I used my Island Indigo Stampin' Write Marker to color the part of that stamp I really wanted to use, and stamped it twice on the label. I used my Large Oval Punch to punch out my Chardonnay Label and layered it on top of a Scallop Oval that I punched from more Island Indigo Card Stock. I finished this label off with a couple of Basic Pearls.


My favorite project out of the entire bunch are these little Blossom Punch Card Holders! I think for the actual party I will put information about the wine and vineyard of these little cards before putting them onto the tables. I have a vision of white fairy lights on a warm Summer evening lighting up a tent draped with tulle. Each variety of wine could be on it's own high top table with these adorable little blossoms scattered around. Aren't you ready for a Summer Cocktail Party now?

Thanks for stopping by today, I hope you were inspired to create something fabulous for your own party! The next stop on our tour today is Holly's Rubber Redneck she's going to be bidding someone a Bon Voyage!

Previous Stop

Next Stop

Thursday, February 23, 2012

Another Blog Hop!


Stop by tomorrow for the Stampin' Addicts 3rd Anniversary Blog Hop!

I'm planning a Wine Tasting Party - what else? Hope to see you then!

Wednesday, February 22, 2012

March Make & Take


If you have booked your workshop for March here is the first card your guests will make. This is a great project for new stampers, and I have put together a list of supplies used for easy ordering. Imagine the possibilities with one stamp set, a set of markers, and a couple packages of card stock. With a purchase of the supplies used on this card, the Kindness Matters stamp set will be FREE! and who doesn't like free stuff?

Stampin' Up! products used
Stamps:
Kindness Matters #127724 FREE with a qualifying purchase
Ink:
Stamp n Write Markers 2011-2013 In Colors #123002 $14.95
Card Stock:
2011-2013 In Colors (20 Sheets)#124329 $6.95
Whisper White Card Stock(40 sheets)#100730 $8.50
Accessories:
Basic Rhinestones #119246 $4.95
Snail Adhesive #104332 $6.95
Itty Bitty Shapes Punch Pack (set of 3 punches!)#118309 $16.95 (one of my personal favorites!)

The above supplies will give you enough product to make up to 80 Cards for at the cost of .75 cents each - that's a real value!

Do you live too far away to host a workshop with me? Did you know you could also host a catalog party? I would be happy to send you samples of this month's make and takes - contact me through my Stampin' Up! Demonstrator Website for more information!

If you haven't booked your workshop yet don't wait! You only have until March 31st and time is ticking on this year's Sale-A-Bration!

Stop back by tomorrow to view the 2nd Make and Take for March!

Monday, February 20, 2012

Clean and Simple Stamping!

A couple weeks back my preschool held an Open House for new families. I wanted to follow up with families who came to visit, so I made these cards to send out as Thank You's for stopping in. Without lots of layers, they were quick to mass produce, and will be easy to mail. Please send some good vibes out to the universe for us - we would like to fill our classrooms for the fall!

Thanks for stopping by!

Saturday, February 18, 2012

Stamping With Smooch


About a week or so ago I posted a project that was stamped with Smooch Spray. Here is a quick view of how I inked my stamps. As you can see from this project I didn't actually ink a stamp with it, it was the bottom of a coffee cup - but when I stamp with Smooch or Shimmer Paint I use the same technique.

Step 1: Spray your sponge.Steps 2 & 3: Ink your image with your sponge and stamp.As always when spraying your Smooch onto a project, sponge, or whatever - be sure to watch where the nozzle is pointing and be careful of over spray. You don't want to ruin any nearby projects!

Tuesday, February 14, 2012

Happy Valentine's Day


Don't you just love handing out smiles? I do! I made these treats for my coworkers for Valentine's Day.I used some retired DSP to put inside of a clear envelope before stuffing it with my favorite Valentine treat - Hershey's Marshmallow Hearts! Then I sealed the envelope, and made a band with some retired grosgrain ribbon and stuck a tag inside! I love these tags, there are so many things you can do with the Two Tags Die ( Did I say that I love this thing?!). Emma even made her class Valentines using the other tag - but - ooops I forgot to photograph her Valentines before sending them off to school! Here's a close up of the tag stamped with my favorite Valentine set P.S. I Love You: Thanks for stopping by. Hope you had a great Valentine's Day ~ I know I did!

Friday, February 10, 2012

Those Designer Cuts Cards


Here's a card I made to send to a friend who recently lost a close family member. I'm a little late in getting it out, but I want her to know I'm still thinking of her. For this card I used a combination of Blushing Bride and Pretty In Pink (still my favorite shade of pink!) and a retired stamp set called thanks for caring. I love the softness of that little butterfly, don't you?

Wednesday, February 8, 2012

February Thank-Yous

I am always in need to Thank You cards! Here are the ones I made to use this month! This Everyday Enchantment Paper is to die for. Did you know that you can only get this for FREE with your Sale-A-Bration Order? Call me today for your catalogs!

And check out this doodling - perfect to disguise those edges you didn't notice on your inked stamp - that somehow showed up on your stamped image! Or in other words - an "oops" covered up!

Tuesday, February 7, 2012

Another 411 Sketch!


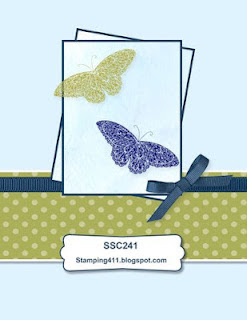
Yesterday I posted an interpretation of this week's Stamping 411 Sketch. I needed two Sympathy Cards so I in order to wrap up these cards quickly on Super Bowl Sunday, I used the same sketch for both cards.

On this card I used Soft Suede, Lucky Limeade, Early Espresso and Very Vanilla as a color combination. The stamp set is Just Believe.

Thanks for stopping by today!

Monday, February 6, 2012

Time for Another Sketch!

Here is this week's Stamping 411 Sketch. You can see other fabulous creations using this sketch by going here. This is my version of this week's sketch and I hope you like it!

One of my Stamping Goals this year is to use as much of my supplies as I can while they are still current. I sometimes have ALOT of designer papers left in my stash when things are retired. Yesterday I broke out my Paisley Petals pack - to make this card to play along with this week's Stamping 411 challenge.I also used one of my Beau Chateau Side Notes as the focal point on the card front. These accent pieces are perfect for quickly adding a finishing touch to a project or card. Of course I seem to find it difficult making any card quickly, so I added some touches of Log Cabin Smooch with my Aqua Painter to accent the leaves on the main image.

One thing I've been doing to get more mileage from my Smooch Sprays is them to paint and stamp. You can see on the inside that I stamped the image using the Log Cabin Smooch rather than a traditional ink. I love the look I get from using this spray as an ink! Stop by later this week, and I'll share how I did this!

Wednesday, February 1, 2012

A Very Special Thank You


Have you ever had the opportunity to meet someone who has unknowingly inspired you in some way? Recently I had the opportunity to meet someone who has touched my life in many ways over the years, and continues to be an inspiration. Long story short - this card is for that person!

I needed a Thank You card, and found this perfect sketch on Stampin Addicts. I used the Thank You from this year's Sale-A-Bration Set Outlined Occasions to create this card. I have always thought shades of Green and Purple look great together!

Thanks for stopping by today! I hope you find something that inspires you!