Tuesday, February 26, 2013
Spring Baby!
Hi stampers, my post is a short one today. I am sharing a card I made for some friends who just found out they are expecting a baby boy...how exciting! I inked up the little frog from the Spring Sampler with Gumball Green, as well as some of the images from That's The Ticket. I punched out the tickets and popped them out with Stampin' Dimensionals and tied a bit of Lucky Limeade Baker's Twine to the top of the card. Can you even get any quicker and easier than this?
I hope you're all having a great week. Thanks for stopping by!!
Sunday, February 24, 2013
A New Color Challenge
My friend Jennifer Campbell posted this color challenge to her blog yesterday, so I though I would play along. Here is my card for this challenge:
I have to admit that I don't have any DSP with these colors in my collection. I'm not overly fond of any of them, except maybe that Raspberry Ripple, so I had to create my own background paper for this one. I used Crumbcake as the base, and the flower from Bloomin' Marvelous to brighten up the Summer Starfruit, but my favorite part of this card is the flower I created from doilies. The doilies were just a little too big so I punched out three middles and inked them up to change the color - this is such a fun way to change them up a little. Then adhered them to a 2 1/2" circle punch with an Antique Brad. I used the outside of one of the doilies to put an edge back onto the flower, using my 2-way glue to hold it in place.
The Raspberry Ripple piece was pre-cut and left over from another project.
I hope you like my card - thanks for stopping by!
Saturday, February 23, 2013
Spring Bingo
Hi Stampers! Today I am sharing this adorable bingo game that my 9 year old helped me put together for my preschoolers. I love to share my passion for stamping with others, and of course this also includes my family! This ended up being the perfect afternoon activity to do together over our Winter Vacation week.
We picked out a variety of colors to use on this project, beginning with the Bingo Background Stamp and then filling in the squares with images from the Springtime Sampler, currently in Stampin' Up!s Spring Catalog. Once we finished filling in a few bingo cards, we stamped each image once on scrap paper and punched them out using the 1" square punch. We then layered those onto the label punch to make playing cards. Using lots of paper from our scrap drawers we punched out Itty Bitty Butterflies to be used as markers.
We packaged the game in a Clam Shell Box for easy storage and transportation to my classroom. We made one of these during the holidays and the kids loved playing it,so I'm sure they'll be excited to see a new game!
Thanks for stopping by today, and have a great weekend!
Thursday, February 21, 2013
P.S. I Love You
Good morning stampers! Before we get too far away, I have a quick Valentine project to share with you today.
On Valentine's Day I left all the supplies to make these cute little treat boxes for a group of local preschool teachers to make on the lunch breaks. I supplied a variety of ink colors, the pre-cut boxes and some embellishments. They were able to go to the staff room and make a few on their lunch breaks. I wanted to take a picture of the set-up before they began, but was in a rush to get to work myself. I left out some basic instructions - I heard they were helpful - and the center supplied the candy. The teacher's appreciated having something fun to do in the middle of the day, and for me it was a rewarding way to share my love of stamping even though I couldn't be there to help.
I meant to take pictures of the set-up before they got into the goodies but in my haste to start my own day, I forgot. If you are local and know a group of people who would love to do something like this, I would love to share this again so let me know!
I'm off to celebrate 100 Days of School!
Have a fabulous day!
Monday, February 18, 2013
Freshly Made Sketch #73
Hello again stampers, I have a second post for you today, I decided at the last minute to play along with Freshly Made Sketches and here's the card I came up with! I love the bright colors in Sunshine and Sprinkles and it really pairs up nicely with springtime projects, like this card. I started by picking out the prints I wanted to use, then stamped the bunny. I used my Aqua Painter and ink pads to color in the image. I originally intended to color the bunny's dress, but as the card came together the colors reminded me of Emma's first Easter dress, so I left it white with Melon Mambo trim. I used a Stampin' Sponge to ink up my doily with Tempting Turquoise ink. This is a fun way to use those doilies and custom coordinate them to each of your projects. I punched the image out using the 2 1/2" Circle Punch and outlined the punch with my Two-Way Glue and Dazzling Diamonds. I also outlined the Happy Easter banner with the glue and glitter for extra dazzle.
I busted out my new Pinwheel Die - be careful with your platform settings - I wrecked the edge on the first run because I forgot the flip the tab - doh! I found that my paper piercer worked great to fluff up the petals after I assembled it, it was tricky to fit it all together without smooshing the bottom one getting it onto the brad. I finished off the center with a Basic Jewel. I used lots of Stampin' Dimensionals to lift the layers off my card and give it more texture.
I hope you like my creation - thanks for stopping by!
Vintage Thanks...
Here is a CAS card I created using my Stampin' Write markers to try combining these two images when I was in need of a Thank You card the other day. Rather than wasting a half sheet of card stock I had picked up with ink on my fingers (oops!) I stamped and punched out the butterflies for my Bloomin' Happy card found here then covered the inky smear with a piece of scrap DSP from the Sunshine and Sprinkles pack - stamped a Thank You and had a quick and easy Clean and Simple card with the whole piece of paper rescued from the scrap pile!
Sunday, February 17, 2013
Everybunny Loves Balloons
My post today uses the Everybunny, and oh how I love this stamp set! Every image in this set is adorable but I am especially drawn to this hot air balloon. Here this little guy is paired up with some tickets from That's the Ticket, one of my new favorites out of the Spring Catalog. This card is accented with flower punches from the Itty Bitty Punch Pack, and a bit of paper from the Sunshine and Sprinkles Designer Series Paper.
This is one of the cards I am planning for my March workshops. All these items can be ordered through me, but I would love to help you get them for free through your own workshop!
Saturday, February 16, 2013
Bloomin' Happy
I'm Bloomin' Happy! A new box of Stampin' Up! goodies was waiting for me when I got home last night. So of course I had to break into it first thing this morning! Here is the first card I made using my Bloomin' Marvelous Stamp set. I tried to keep this card clean and simple by using a limited number of supplies for some new stampers I will be working with in the coming weeks:
Items used for this card are:
* Whisper White Card Stock #100730 $8.50
* Island Indigo Classic Stamp Pad #126986 $5.95
* Simply Scored #122334 $29.95
* Bitty Butterfly Punch #129406 $15.95
* Bloomin' Marvelous Sale-a-bration Set #129651 $FREE
Items used for this card are:
* Whisper White Card Stock #100730 $8.50
* Island Indigo Classic Stamp Pad #126986 $5.95
* Simply Scored #122334 $29.95
* Bitty Butterfly Punch #129406 $15.95
* Bloomin' Marvelous Sale-a-bration Set #129651 $FREE
Thursday, February 14, 2013
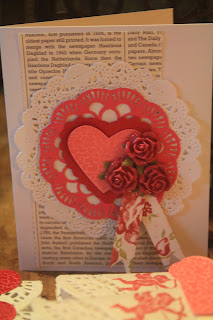
I love getting ready for Valentine's Day almost as much as I love Christmas! This year my daughter and I made class Valentines. She knew right away that she wanted to use the scented embossing powders, so after showing her how to do this, she quickly made 24 cherry and vanilla scented hearts.
As I cut out the hearts, she stamped Cupid onto the Doilies - these are contraband doilies as my refills haven't arrived yet! We stamped and cut out the cute little banners and the assembled the baggies.
Of course we can't forget a Valentine for the teacher either! Here's what I came up with:
This year's projects used lots of Vintage Stampin' Up! - and I want to give a big shout out and THANK YOU to my upline Cindyrae who so generously gifted me with this stamp set - PS I Love You - after I gave mine away as a hostess incentive. I did not realize how much I would miss those stamps when Valentine's Day came around!
Wednesday, February 13, 2013
A Quick Birthday Card
Don't you just love quick and easy cards? This new embossing folder adds a lot of punch to simple designs. I just love how well it goes along with the Up, Up and Away stamp set. For these balloons I used Primrose Petals, Baja Breeze and Lucky Limeade along with Early Espresso. The greeting is stamped in Primrose Petals and then punched out using my Large Oval Punch layered over a Curly Label Punch in Midnight Muse. I was able to create this card in less than 10 minutes - nothing like waiting until the last minute! Thanks for stopping by!
Tuesday, February 12, 2013
Thinking of You
This is a quick, Clean and Simple card design using the Thinking of You a la carte stamp from the Spring Catalog along with the new Embossing Plate for your Simply Scored.
This is a quick design that you can make in about 5 minutes. I think the color combination of Midnight Muse and Basic Gray give it a crisp and clean look that is more on the masculine side. I tend to shy away from Midnight Muse because it is such a dark color, but I've been using it in my projects more frequently.
Thanks for stopping by today!
Saturday, February 9, 2013
MDS - Template
We're still snowed in with a ban on using the roads around here - who ever heard of this? My husband assures me it's a good thing, though I'm not sure I'm convinced. Either way I have no desire to step foot outside my front door, let alone clean off the car and go for a drive - brrr! I am hopeful we'll be dug out in time for Carmen's workshop tomorrow, where we'll be making a 12x12 scrapbook page based on this sketch I found on MDSMonday. Though it's too late to enter it into the challenge, it was perfect for tomorrow's class!
My page is pretty basic. I don't use MDS often but I think this is a going to be a great way to show how you can vary the look of your page by changing out colors and embellishments. Hope all of you are safe and warm - we are grateful that we never lost power and we're still warm here!
Monday, February 4, 2013
Freshly Made Sketch
Looking back, I was thinking that some of my very best work was inspired by various sketches, although I do not always link up to them. Here is my card for this week's Freshly Made Sketch!
For this card I used a retired tag stamped with Vintage Verses from the 2013 Saleabration collection. I'm a bit of a hoarder with my stamping supplies, so when I find really great things I'm sometimes reluctant to "use them up". On a side note, I wish I could say the same with paper...but that's another post! For this card I used a base of Crumb Cake and sponged the edges with Whisper White Craft Ink. I layered the tag and then folded two doilies in half before adhering them to my card front. Next I stuck the Pool Part rosettes in the middle using some Stampin' Dimensionals. (The rosettes were made with my 1 3/8 inch circle punch). I added some large pearls and finished it off with a bit of Pool Party Seam Binding (retired). The whole thing reminds me of a nosegay!
I am hoping to play along with some sketches on a regular basis, but I hope you enjoyed peeking at today's card (and I even think I know who I'll give it to!) Thanks for stopping by!
Sunday, February 3, 2013
Spring Catalog Case
I think this is probably the most cased (copy and share) card in the Stampin' Up! Spring Catalog, but the colors and shapes work so well together that I just had to make one of my own! I would probably have used real chalk if I had a piece with me, but since I didn't- I used my gel pen instead to hand write the sentiment.
I keep wondering what I'm going to do when Pool Party and Calypso Coral retire at the end of May, but I wondered the same thing about Pink Pirouette with Chocolate Chip when it retired as an In Color a few years back. Later Stampin' Up! honored my wish and brought that soft pink back as a regular color, so I am keeping my fingers crossed that these colors make a comeback real soon!
Thanks for stopping by today!
Friday, February 1, 2013
Need Valentines?
Are you looking for some last minute Valentine ideas and inspiration? I have an upcoming Big Shot Valentine class that might settle that score!
The first project I found on Brenda Quintana's blog here
Isn't it adorable? Next up is a set of Candy Wrapper boxes held together with DSP and lacy doilies:
We'll also be making a set of Big Shot tags to top off a set of 2-4-6-8 boxes.
These boxes are great for holding teacher gifts, the are the perfect size for large bottles of hand sanitizer and lotions, or you could just fill them with your favorite treats! Class will be held on Saturday February 9th at 10:30. The cost of the class is $20 and includes one of each of the projects shown. Attendees will have the option of making additional projects to add onto the class. Contact me to reserve your space!
Subscribe to:
Posts (Atom)